
Some people may be confused: why are so many of our car LED headlight modification projects for Toyota?
The answer is simple: Toyota has a huge global owner base, and because they are Japanese cars, they benefit from one of the world’s most mature aftermarket. This means you will have more options for brackets, wiring harnesses, and decoder solutions, and more sophisticated projector headlight configurations.
If you own a Toyota Crown Kluger and have experience driving at night, you’re probably already familiar with this issue. The original headlights are stylish enough, and the lighting effect is also sufficient for city roads. However, for most drivers, the insufficient light intensity makes driving on rural roads difficult, especially in challenging conditions. This lack of light can lead to driver fatigue.
A professional Toyota Crown Kluger Headlight Retrofit solves this problem by upgrading the optical system instead of just changing bulbs.
Introduce
In this Toyota Crown Kluger headlight retrofit project, we will use AKE LED projector modules and projector lenses to upgrade the headlights.
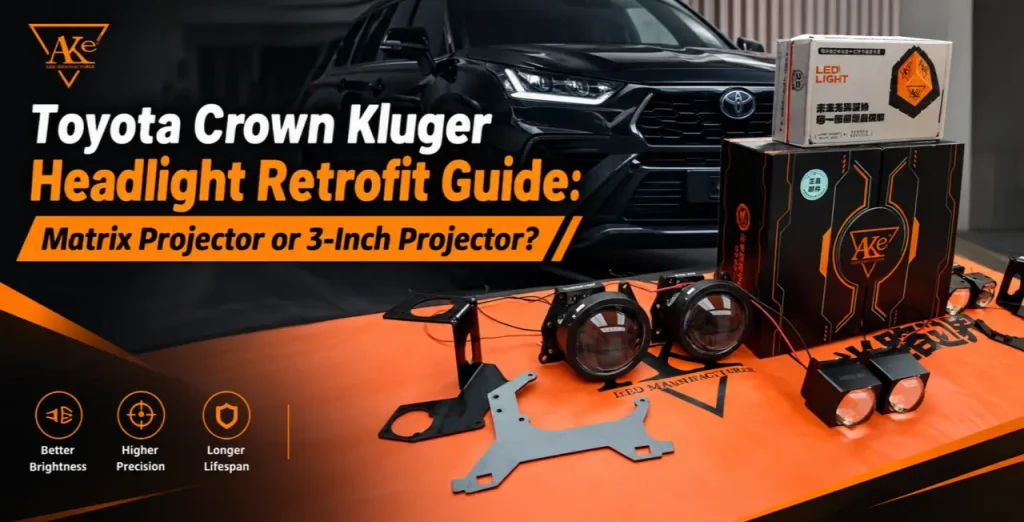
The customer doesn’t just want to instead of simply replacing the original light source, they want to focus on improving the headlight’s optical system.
One of the key questions during the headlight upgrade was:
Should the Toyota Crown Kluger use a Matrix LED projector or a conventional 3-inch projector?
This guide explains the difference between the two solutions and walks through the main stages of this Toyota Crown Kluger headlight retrofit project, including projector selection, installation steps, beam testing, and the final lighting improvement.
We’ll also detail the AKE dual-LED projection lens and matrix module options we used in the Toyota Crown Kluger Headlight Retrofit installation.
Why Upgrade the Toyota Crown Kluger Headlight?
Before comparing solutions, it’s worth understanding what you’re actually working with in a Toyota Crown Kluger Headlight Retrofit.
The Toyota Crown Kluger has a headlight assembly that has three lighting positions per side. However, the factory equipment only places a functional projector in one of those three positions.
The remaining two positions are filled with non-functional or low-output elements that look good in a showroom but don’t help on a dark highway.
Key limitations of the factory setup:
- Only one of the three positions does real work.
- The other two positions are mainly cosmetic and add little usable light.
- Factory LED brightness and beam pattern are conservative, limiting visibility at highway speeds, on mountain roads, and during rainy nights.
- The beam cutoff is not sharp enough, which can cause glare for oncoming vehicles.
- Many owners want more low-beam width and high-beam range without losing the original three-eye look.
That is exactly why a Toyota Crown Kluger Headlight Retrofit with an AKE Bi-LED projector lens or matrix module makes sense for this platform.
Matrix Projector vs 3-Inch Projector: Which Is Better?
There is no single standard answer for every Toyota Crown Kluger Headlight Retrofit.
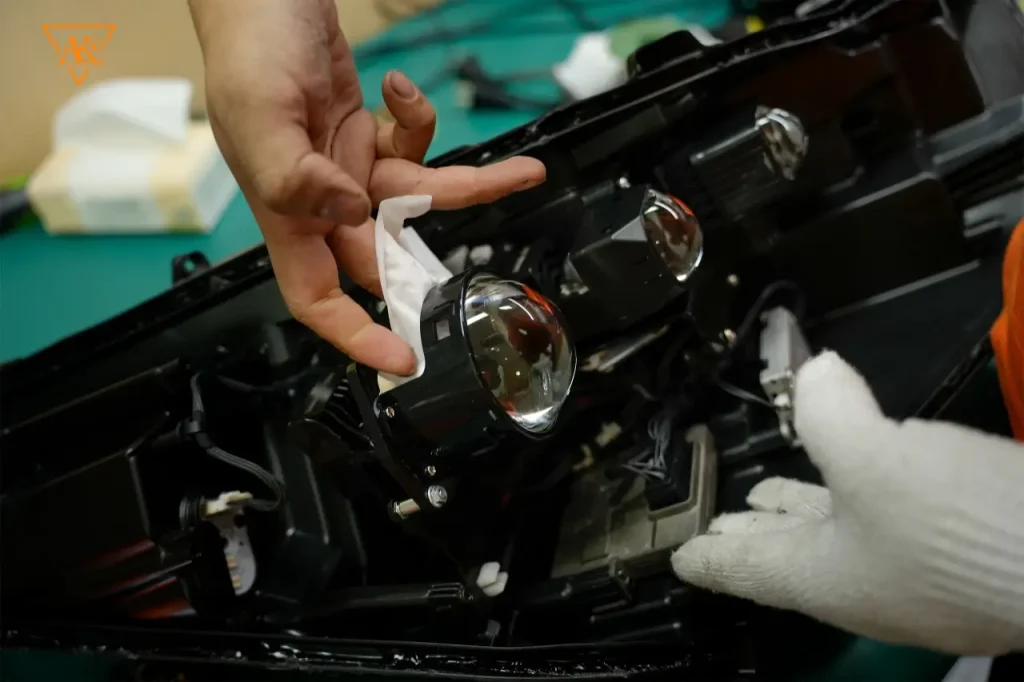
We will only provide our clients with the best headlight upgrade solutions, allowing them to make their decisions based on their actual needs.
| Feature | Matrix LED Projector | 3-Inch Projector |
| Lighting Technology | Advanced multi-zone lighting | Conventional projector lighting |
| Beam Control | More advanced | Standard focused beam |
| Low Beam | Excellent | Excellent |
| High Beam | Advanced control | Strong and focused |
| Road Illumination | Wide and controlled | Strong and direct |
| Retrofit Complexity | Higher | Relatively simpler |
| Installation Requirements | More demanding | More straightforward |
| Appearance | High-tech | Classic projector style |
| Best For | Premium upgrades | Performance-focused retrofits |
| Budget | Generally higher | More flexible |
| Maintenance | More complex | Easier |
For a Toyota Crown Kluger headlight retrofit, matrix headlights are a better choice if the customer prioritizes advanced lighting technology and a high-end upgrade.
However, if the customer prioritizes strong lighting effects, reliable optical performance, and a simple modification, 3-inch projector lenses are a good option.
Why Recommend AKE LED Modules and Lenses?
AKE is a professional manufacturer of LED projection lenses and modules, with products covering:
- 3-inch Bi-LED laser lenses (such as AS6, AS8, F5 series, etc.)
- Matrix mini modules (including dual-laser Matrix)
- High-power LED chips + aviation-grade aluminum heat sink + blue film/high-transmittance lens
Common upgrade configurations in Toyota Crown Kluger Headlight Retrofit projects:
- Replacing the original headlight with an AKE 3-inch dual-beam laser projector lens achieves a wider near beam, a farther far beam, and a cleaner cutoff line.
- Some LED headlight upgrade solutions can be stacked with matrix modules or laser projectors to enhance high-power output.
- Color temperature is typically controlled between 6000K and 6500K, close to sunlight, reducing fatigue.
- Waterproof, dustproof, long lifespan (most claim over 50,000 hours), and supports original interfaces or simple adapters.
After the actual Toyota Crown Kluger Headlight Retrofit:
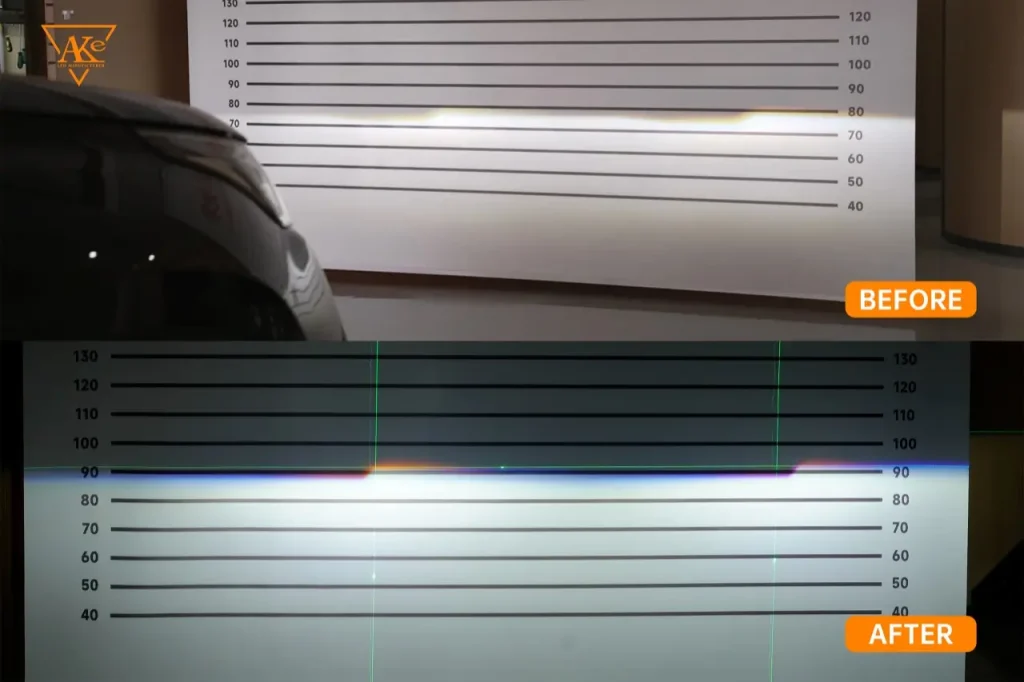
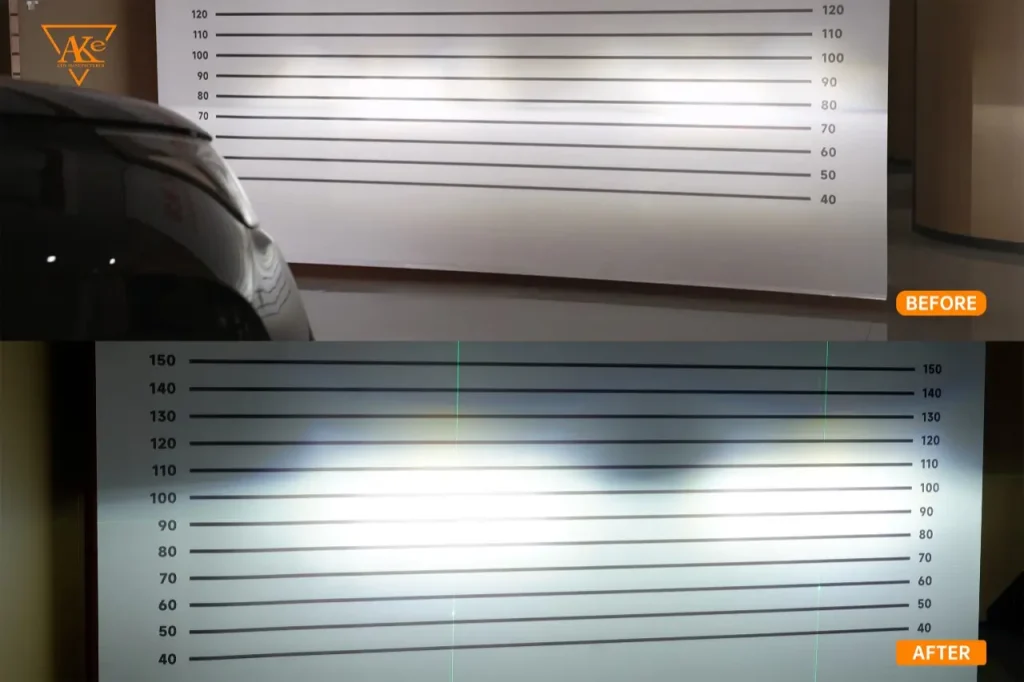
- Wider, more even low beam — shoulders and road signs are easier to see.
- High beam reaches hundreds of meters and cuts through rain and fog better.
- Clear beam cut-off line keeps glare away from oncoming drivers.
- The original three-lamp design is kept, so it still looks factory-clean.
Toyota Crown Kluger Headlight Retrofit Process
The following steps show the general retrofit process for a Toyota Crown Kluger Headlight Retrofit project.
Step 1: Remove the Original Headlight
First, remove the original Toyota Crown Kluger headlight assembly. Carefully remove the exterior parts and disconnect the original headlight wiring.
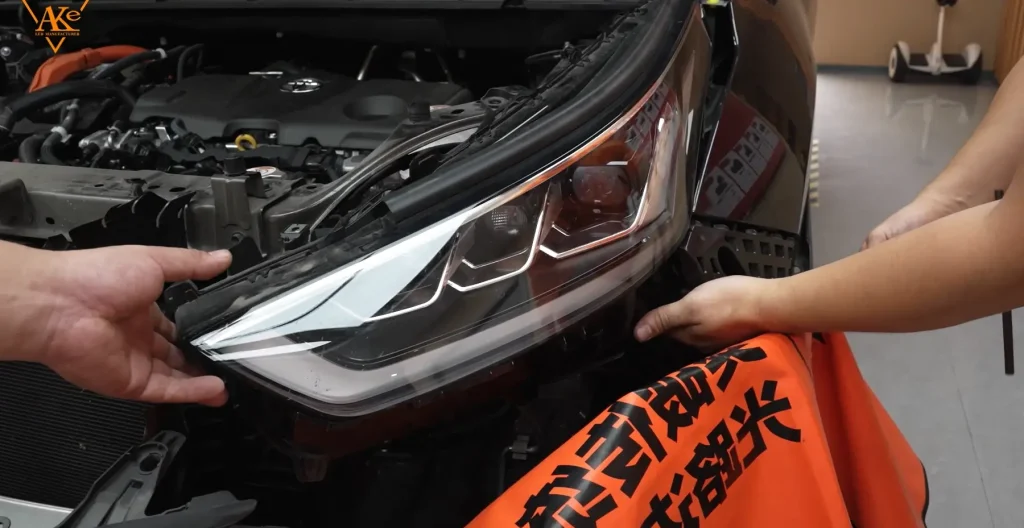
Then put the headlights on a clean workbench to inspect them. At this point, you need to be careful to avoid damaging the housings, mounting points, wiring connectors, or seal areas.
Step 2: Clean and Apply Protective Film
Give the headlights a good clean first—remove any dirt, dust, or grease. Then put protective film over the lens so it doesn’t get scratched while you’re working on the housing.
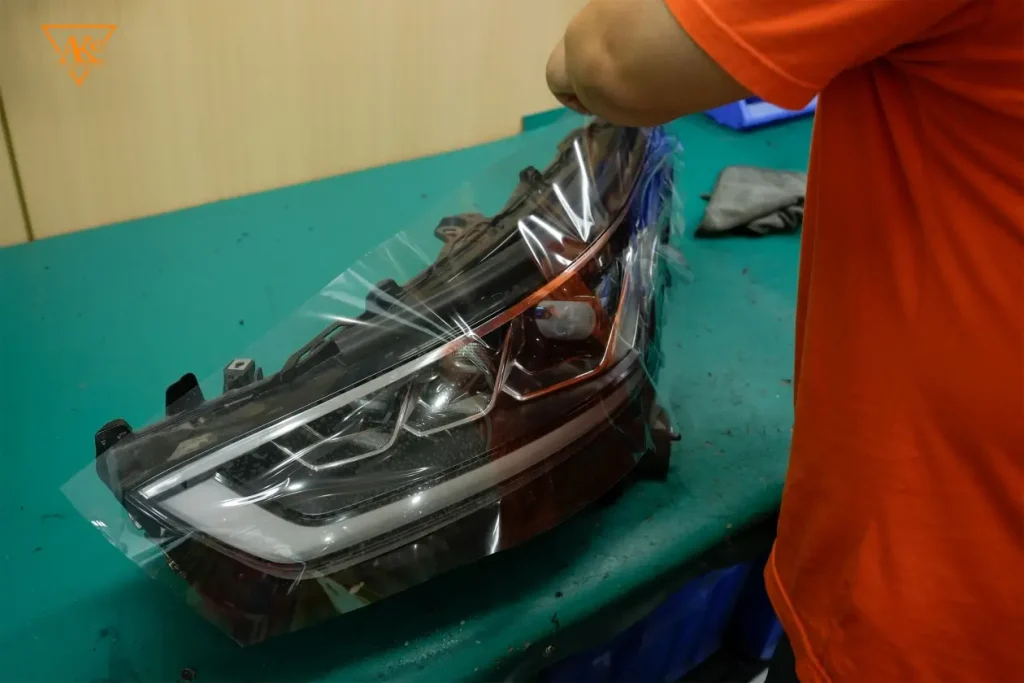
Step 3: Open the Headlight Housing
To open the housing, we need to soften the sealant. Put the headlight in an oven and heat it at the recommended temperature and time—this makes the glue soft enough to separate the lens from the housing.
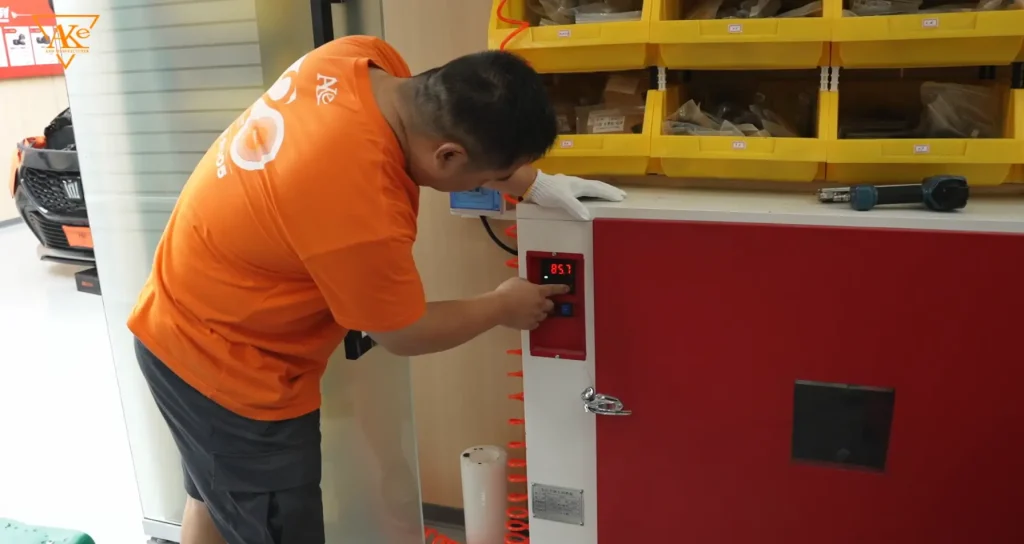
Once it’s heated, take it out and carefully pry the lens off with the right tools. Don’t rush it, and don’t use too much force. Too much heat or pressure can damage the lens, housing, clips, or internal parts.
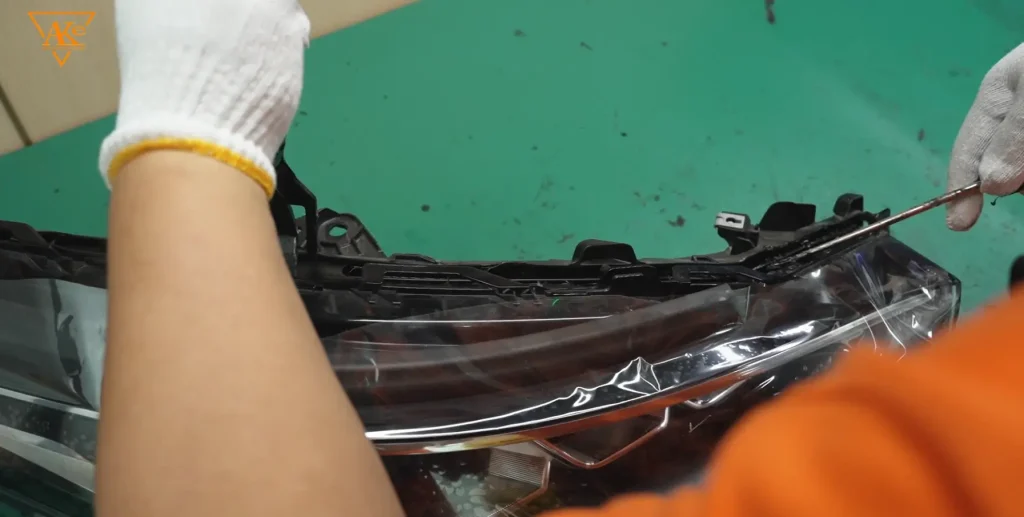
With the housing open, you can now inspect the internal structure and figure out how the AKE projector module will be mounted.
Step 4: Remove the Original Projector
Take the original projector and other optical parts out of the headlight assembly.
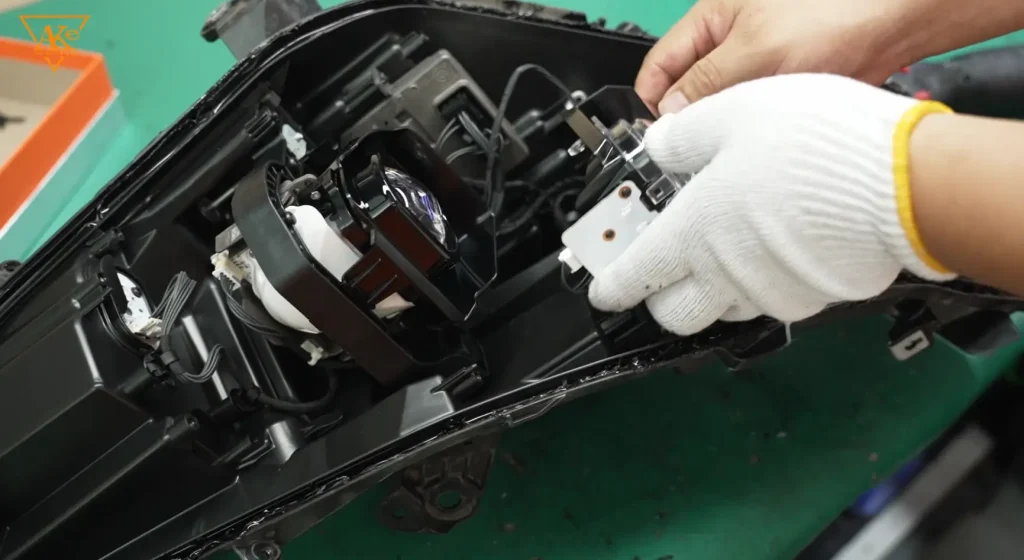
Mounting position is everything here. Even a top-tier projector won’t perform the way it should if it sits at the wrong height, angle, or optical axis.
Step 5: Install the AKE LED Module & Projector
Now fit the AKE LED module & projector into the Crown Kluger headlight. Depending on the housing version, you may need a custom bracket or adapter to get the projector sitting in the right spot inside the factory housing.
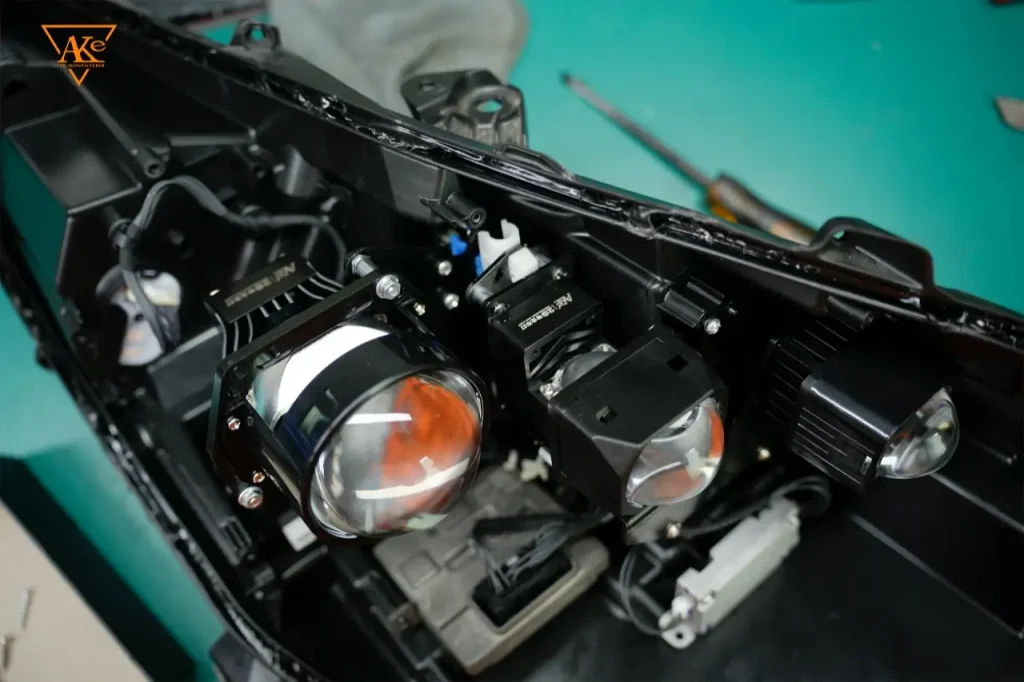
Things to check at this step:
- Projector center position
- Horizontal alignment
- Vertical alignment
- Mounting stability
- Clearance to the lens
- Clearance inside the housing
The projector module has to be locked down solid. If it shifts after installation, the beam pattern will be off.
Step 6: Test the Beam Pattern
Before you seal the headlight back up, test the projector first. If it’s installed on the car without proper beam pattern adjustment, it will have to be disassembled and readjusted later.
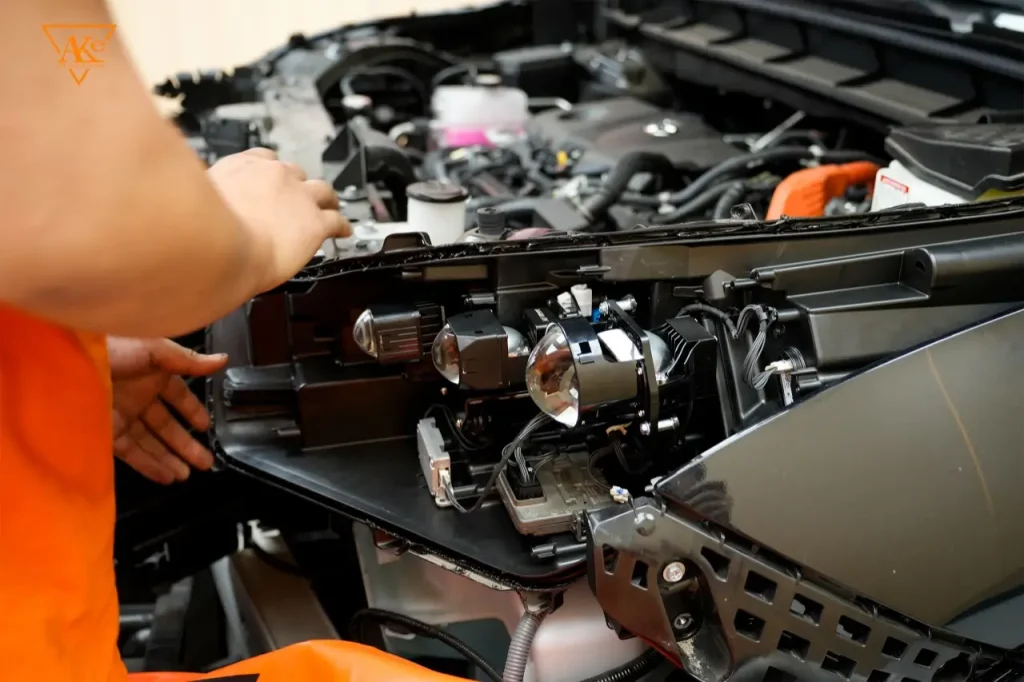
Check the low beam, high beam, and laser beam to make sure the optical system is working properly.
What to look at during the test:
- Cutoff sharpness
- Beam width
- Hotspot intensity
- High-beam reach
- Left/right symmetry
- Projector alignment
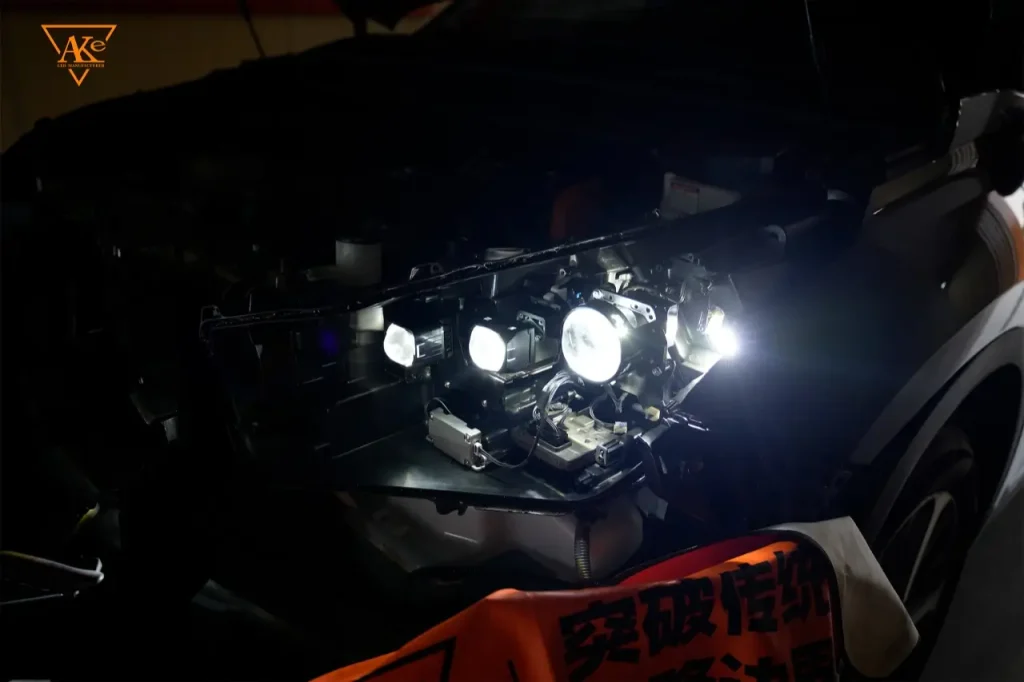
- Killing point: Alignment is critical after a retrofit. If the projector sits off, you will lose usable light on the road or throw too much glare at other drivers.
We need to understand that turning on the projector lens does not mean the modification is complete—the real goal of our headlight upgrade is to obtain the correct beam pattern, which can effectively illuminate the road while controlling glare.
Step 7: Seal and Reassemble the Headlight
Once we have finished the testing, reseal the headlight housing.
We use AKE hot melt sealant for this. Make sure it’s heated properly and applied in an even bead—fill the whole channel with no gaps.
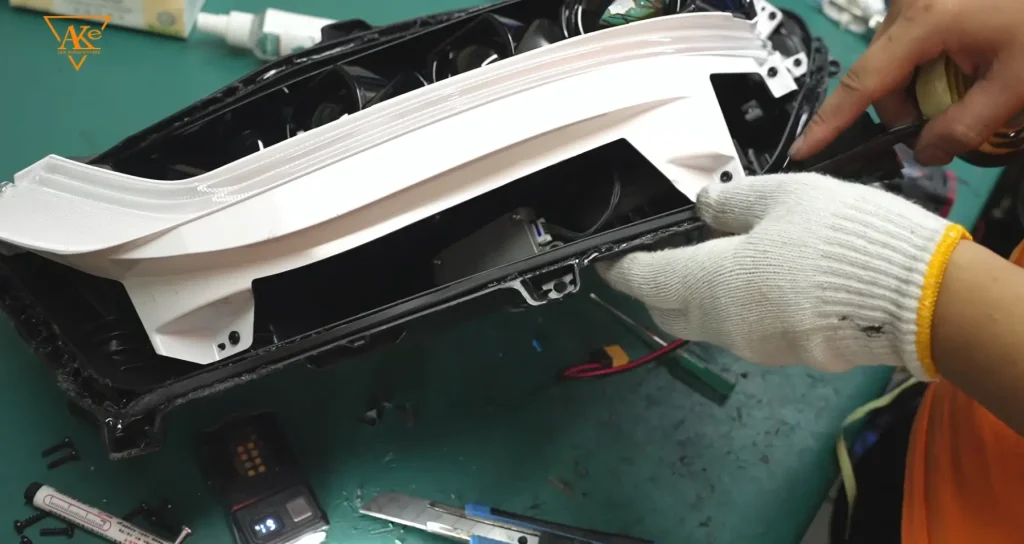
A good, proper seal keeps moisture, dust, and road grime out. Then reinstall the headlight assembly on the Toyota Crown Kluger.
Step 8: Final Lighting Test
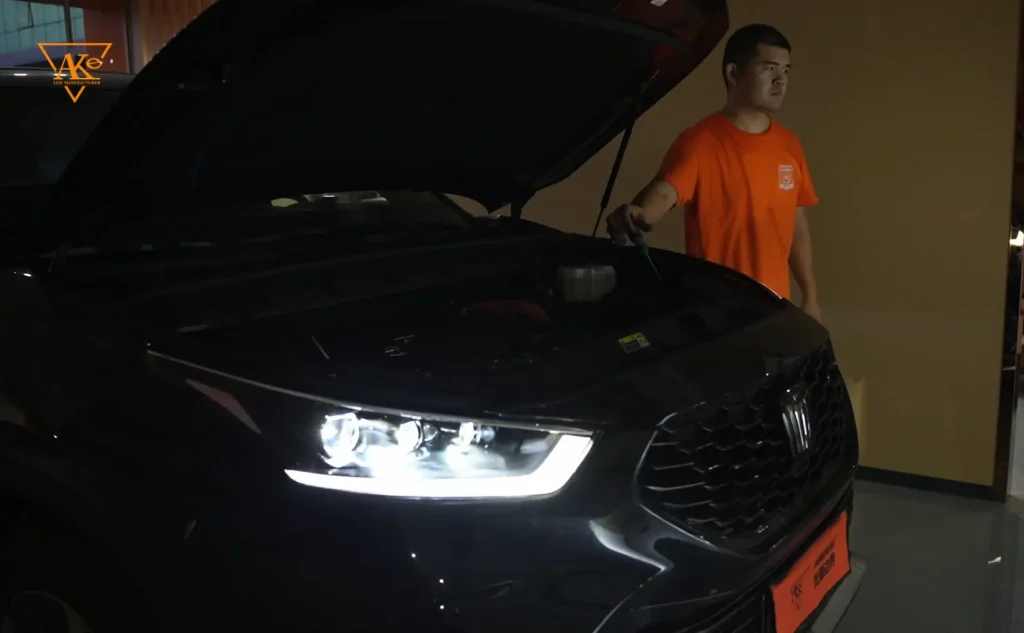
After reinstalling the headlights on the vehicle, a final alignment was performed.
Check the lighting from different distances and angles to confirm the result.
What Is the Best Projector for Toyota Crown Kluger Headlight Retrofit?
There’s no single answer. It comes down to what the owner actually wants from their Toyota Crown Kluger Headlight Retrofit.
Choose a Matrix LED Projector if you:
- Want the advanced lighting technology
- Are building a high-end custom headlight
- Want more advanced beam control
- Care about the modern, high-tech look
- Don’t mind a more involved install
Choose a 3-Inch Projector Lens if you:
- Want strong illumination
- Prefer a proven projector design
- Want a simpler retrofit
- Want easier installation and adjustment
- Want a strong balance between performance and cost
So there’s no “best” projector for every Crown Kluger headlight upgrade. The right choice depends on the original headlight structure and what the customer really needs from their lighting.
Final Result: Toyota Crown Kluger Headlight Retrofit
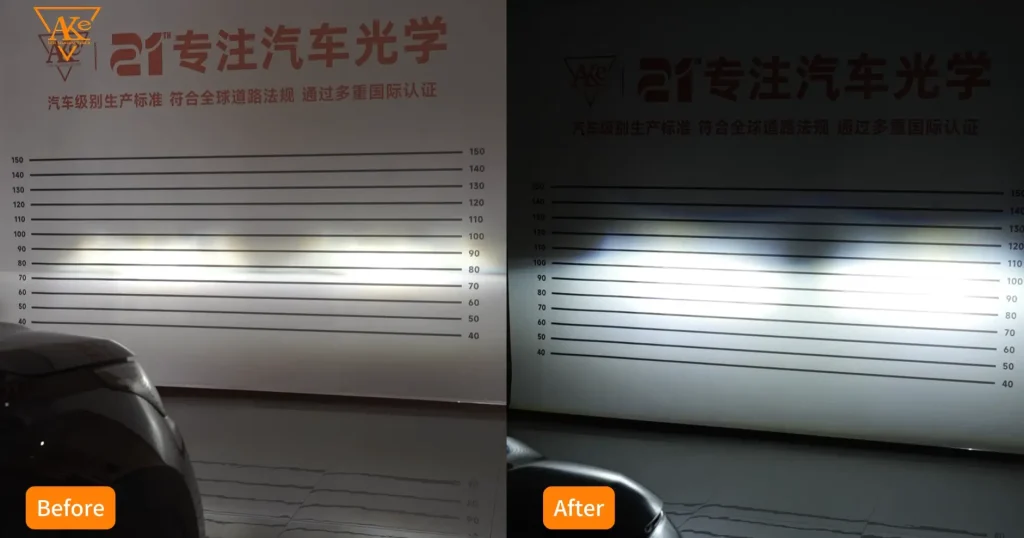
This Toyota Crown Kluger headlight upgrade project makes an important point: better headlights are not just about throwing in more powerful LEDs. The projector lens optical design, mounting position, cooling, and final beam alignment all play a role.
If a customer is looking for a premium upgrade, a Matrix LED projector is the way to go. If they want strong, powerful illumination output, proven performance, and an easier install, a 3-inch projector lens is an excellent choice.
With the right AKE LED projector module and professional installation, the Toyota Crown Kluger can significantly improve its overall lighting system while maintaining the original headlight housing.
AKE LED Projectors for Professional Headlight Retrofit
AKE provides automotive LED lighting solutions for retrofit shops, distributors, installers, and automotive lighting businesses.
Our product range includes:
- LED Headlight Bulbs
- Bi-LED Projector Lenses
- Matrix LED Projectors
- LED Grille Lights
- D-Series LED Headlights
- LED Fog Lights
- Automotive LED Lighting Solutions
For Toyota Crown Kluger Headlight Retrofit projects, AKE projector modules can be selected according to the required performance, installation space, and application.
The advantage of working with a professional automotive lighting manufacturer is that different projector solutions can be evaluated according to the actual retrofit requirements rather than using one universal product for every vehicle.
Want to Upgrade Your Toyota Crown Kluger Headlights?
If you are a retrofit shop, automotive lighting distributor, installer, or headlight customization business looking for LED projector modules & projector lenses.
AKE can provide different car LED projector solutions for professional applications.
Contact AKE to discuss your vehicle application, projector lens requirements, and wholesale/OEM options.
AKE — Professional LED Headlight & Projector Manufacturer in China.
