
Introduction
The Toyota Alphard has long been recognized as one of the most popular luxury MPVs in Asia and many international markets. It is a top choice for business travel, executive travel, family outings, VIP transportation, and high-end vehicle modification projects.
However, many car owners have raised a question: when driving at night in complex road conditions, insufficient brightness, limited illumination distance, and inaccurate glare control can occur. This is particularly inconvenient when we’re picking up or dropping off clients or family members. Especially on highways, mountain roads, or in rainy or foggy weather.
Because of this issue, our factory’s offline professional modification shop welcomed a special customer—Mr. Lin and his Toyota Alphard. He wanted a professional Toyota Alphard LED headlight upgrade to improve the vehicle’s nighttime lighting performance while maintaining its high-end, modern appearance.
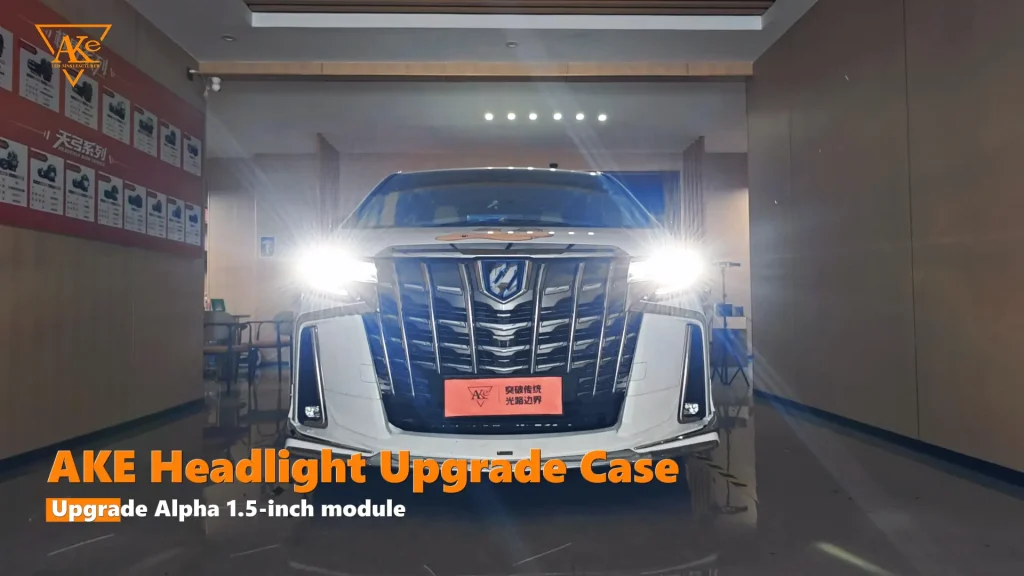
Toyota Alphard LED Headlight Upgrade: Project Overview
This Toyota Alphard LED headlight upgrade was developed as a professional headlight retrofit project for a luxury MPV. Instead of simply replacing the original bulbs, the modification team upgraded the internal headlight system with an AKE Matrix LED module.
The entire modification process, from consultation to delivery and acceptance, was conducted by our professional modification master. Please see below for the complete process of our Toyota Alphard LED headlight upgrade. An in-depth analysis of the technical advantages of the AKE M2 Matrix LED module, for reference by car owners with similar needs.
Why Choose a Toyota Alphard LED Headlight Upgrade?
A professional Toyota Alphard LED headlight upgrade can provide more than simply increased brightness.
Customer Pain Points and Modification Needs
Mr. Lin’s Alphard is a common 30/40 series model used mainly for business trips and long family journeys. For this vehicle, the Toyota Alphard LED headlight upgrade focused on solving the lighting limitations of the original configuration.
The original headlights may not be bright enough under certain driving conditions.
- The illumination distance may feel limited when driving at night.
- The beam patterns may not provide the visual clarity expected from a luxury aftermarket modification.
- The factory headlights may not look stylish enough compared to newer, higher-end models.
- Consumers may desire more personalized and modern lighting effects.
The Car Owner Clearly Stated Three Core Requirements:
- Improve nighttime lighting brightness and illumination distance, and fully comply with regulations and actual safety requirements.
- Keep the original headlight assembly’s appearance, preserving the vehicle’s overall luxurious feel.
- Choose reliable and durable products; first, consider professional solutions directly from the factory, with comprehensive installation and after-sales support.
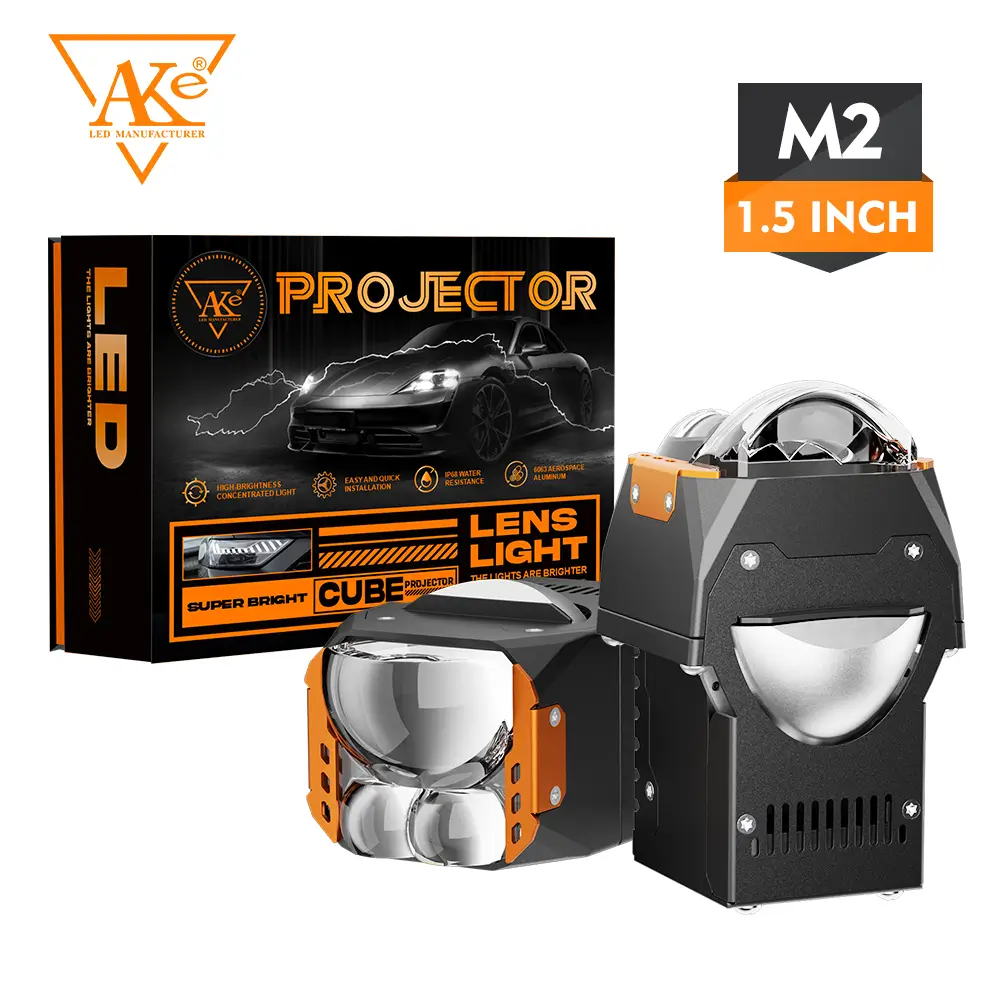
Ultimately, after our modification technicians conducted on-site lighting tests and examined the headlight structure, we recommended and ultimately used the AKE M2 Dual Laser Matrix Module for Mr. Lin.
The M2’s compact size and precise beam pattern make it a perfect fit for the Alphard’s luxury MPV, which prioritizes sophistication and comfort.
Why Choose AKE Matrix LED Modules?
For this Toyota Alphard LED headlight upgrade, the modification team selected the AKE M2 Dual Laser Matrix Module as the core lighting component.
AKE, a manufacturer specializing in automotive LED lighting, uses a matrix zone control concept and dual-laser enhancement technology in its Matrix series modules. Taking the M2 dual-laser matrix module used in this study as an example, its main technical features include:
- Unique Optical Design: Low Beam on Top, High Beam on Button
Unlike traditional modules, the M2 employs an innovative “low beam above, high beam below” layout. This design optimizes cut-off line clarity, enhances the illumination of road signs and overhead markings, and simultaneously allows the low beam pattern to better conform to the road surface, reducing ineffective scattering.
- Dual-Laser + Matrix LED Composite Light Source
The M2 module features a high-performance LED chip array and integrates dual laser units. The low beam is approximately 40W, the high beam is approximately 45W, and the high beam + laser mode can reach approximately 60W.


Laser assistance can significantly extend the illumination distance when needed, resulting in stronger penetration.
- Blue Coating Lens and Precise Beam Pattern
We can customize a lens with a high-quality blue coating.
Combined with a matrix-style zoning design, the beam is uniform, and the cutoff line is sharp, ensuring both the driver’s field of vision and minimizing interference with oncoming vehicles.
- Compact 1.5-inch Size
The 1.5-inch size isn’t just about being small for the sake of being small; it’s about minimizing your hassle during modification. It easily integrates into the original Alphard headlight housing, preserving the integrity of the original housing to the greatest extent possible, without damaging the structure or causing future problems.
At the same time, ample internal space allows for easy beam calibration and cutoff adjustment later on.
Because of its balance between ease of installation and future maintenance, the AKE matrix LED module is highly favored by modification enthusiasts.
Toyota Alphard LED Headlight Upgrade and Retrofit Process
The Toyota Alphard LED headlight upgrade was completed by one of our offline automotive modification shops in Guangzhou, China.
Professional installation is extremely important when upgrading automotive LED headlights.
Unlike a simple plug-and-play bulb replacement, an LED projector Matrix module upgrade requires modifications has a large professional knowledge and experience.
The modification process typically includes several important stages.
Preparations Before Starting
Before starting the Toyota Alphard LED headlight upgrade, our technicians inspect the original headlight assembly.
Checklist:
- Headlight housing condition
- Internal installation space
- Original lighting structure
- Mounting method
- Electrical connections
- Heat dissipation requirements
- Beam alignment position
After the technicians confirmed there were no serious signs of aging or leaks, a detailed modification plan was developed. Besides, we also showed similar modification cases to Mr. Lin, clarifying the expected results and precautions.
Step 1: Remove the original lamp
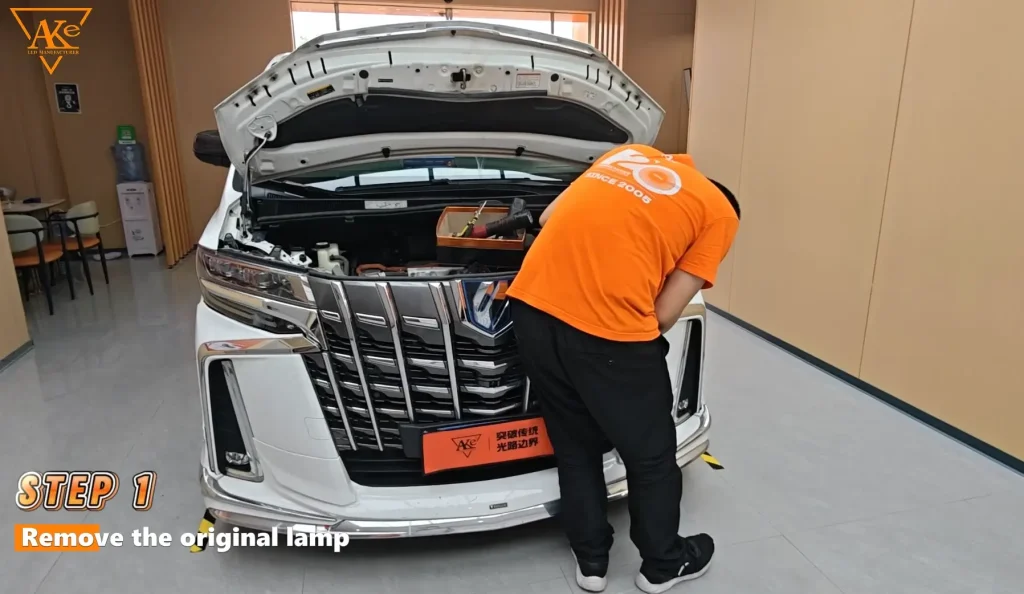
Carefully open the headlight assembly. Then, using specialized tools, remove the front bumper and headlight assembly.
It’s important to add a protective film or banner at this step to protect the car in front from being scratched.
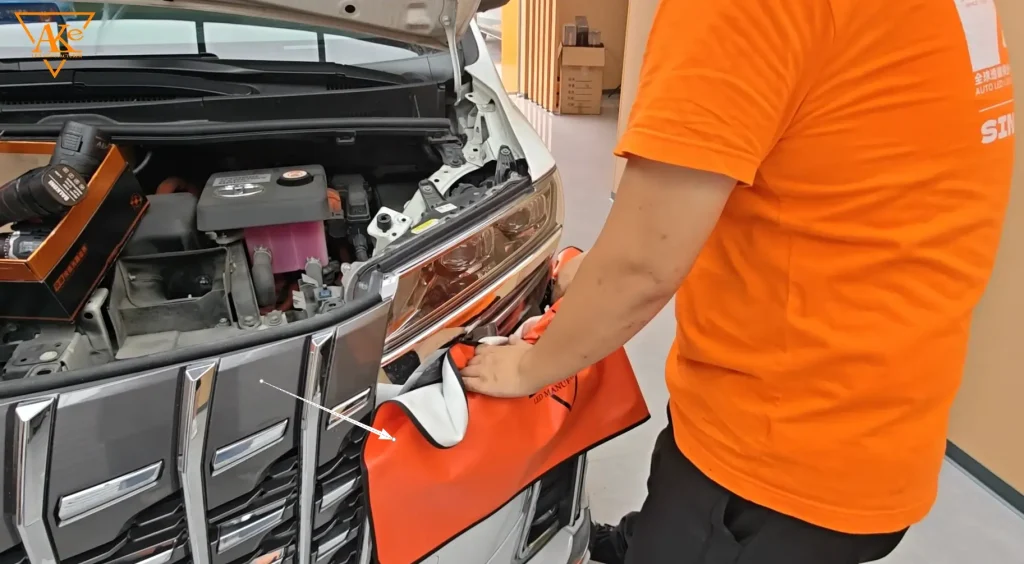
Step 2: Clean the cover shape & apply the protective film
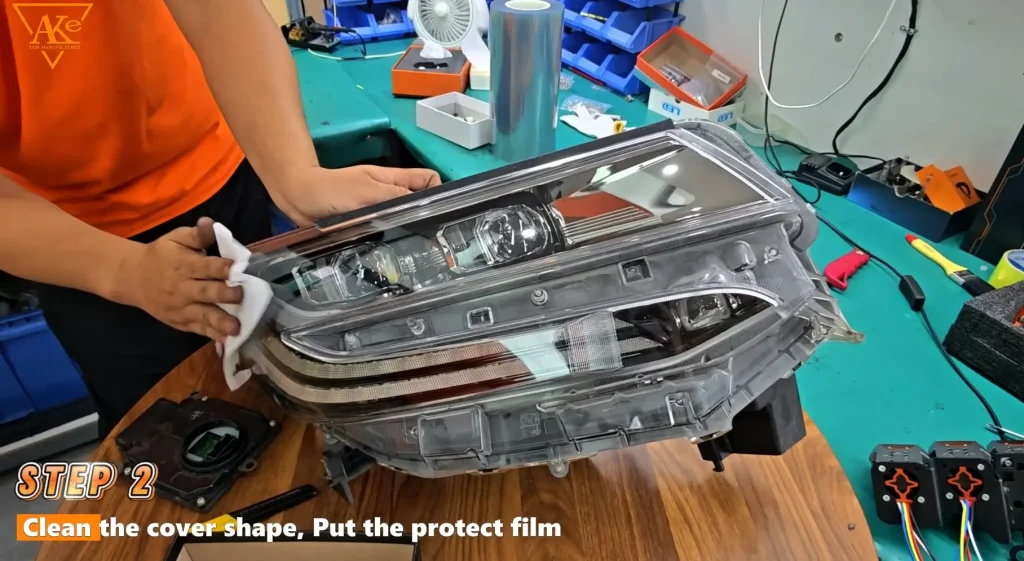
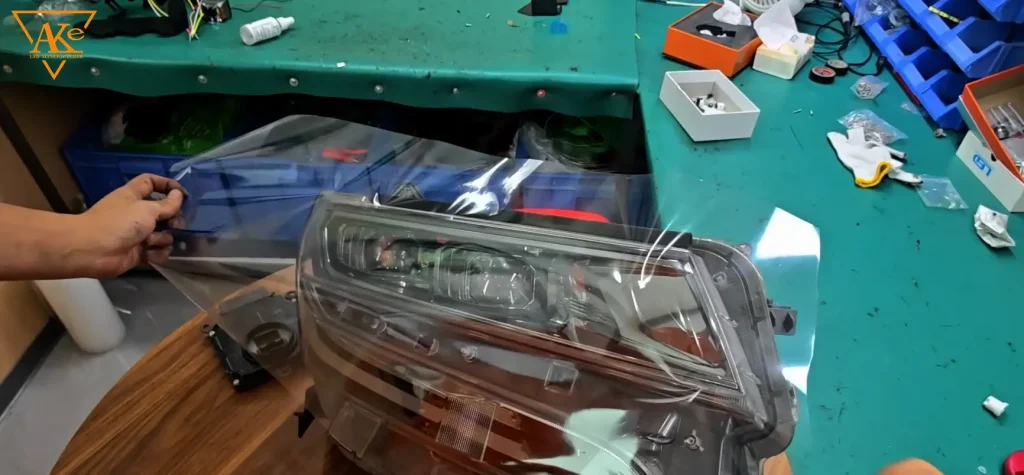
In this step, we need to clean the surface of the front-end assembly to remove dust, oil, and residual wax.
Then, apply a special protective film to the paint surface and headlight housings to prevent scratches or contamination during subsequent disassembly and reassembly.
Step 3: Oven heating (Cold Sealant Protocol)
Normally, professional repair shops use specialized equipment and controlled heating methods to open sealed headlights. At our shop, we have a large oven specifically for heating the components, allowing the headlight housing to open in a temperature-controlled environment.
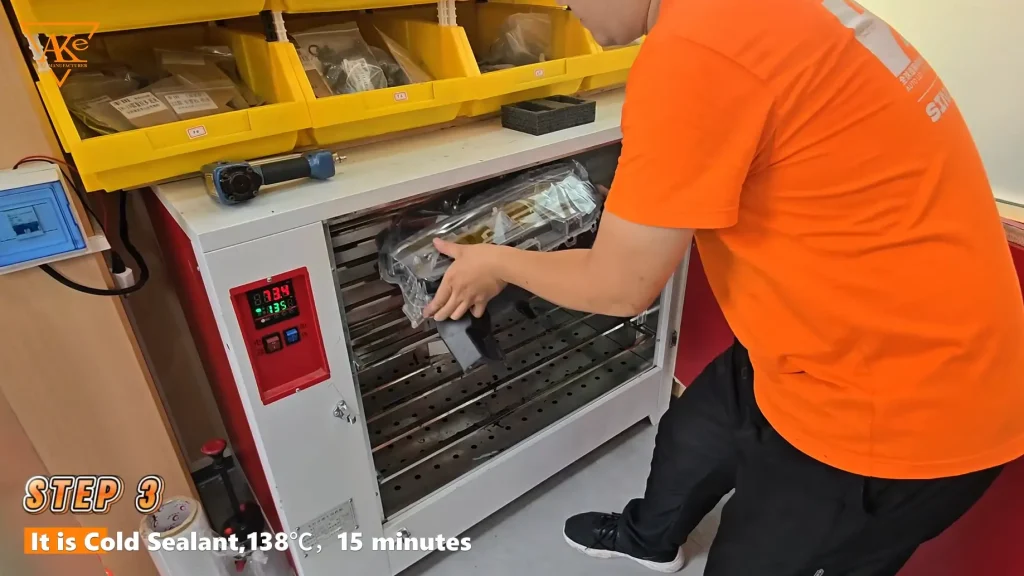
- – Equipment: Professional headlight baking oven
- – Temperature: 138°C (±2°C)
- – Duration: 15 minutes (fixed cycle)
- – Purpose: Uniformly soften the factory cold‑seal adhesive to enable non‑destructive lens removal.
Step 4: Open the lamp housing
After the 15‑minute heating cycle, the cold sealant becomes pliable.
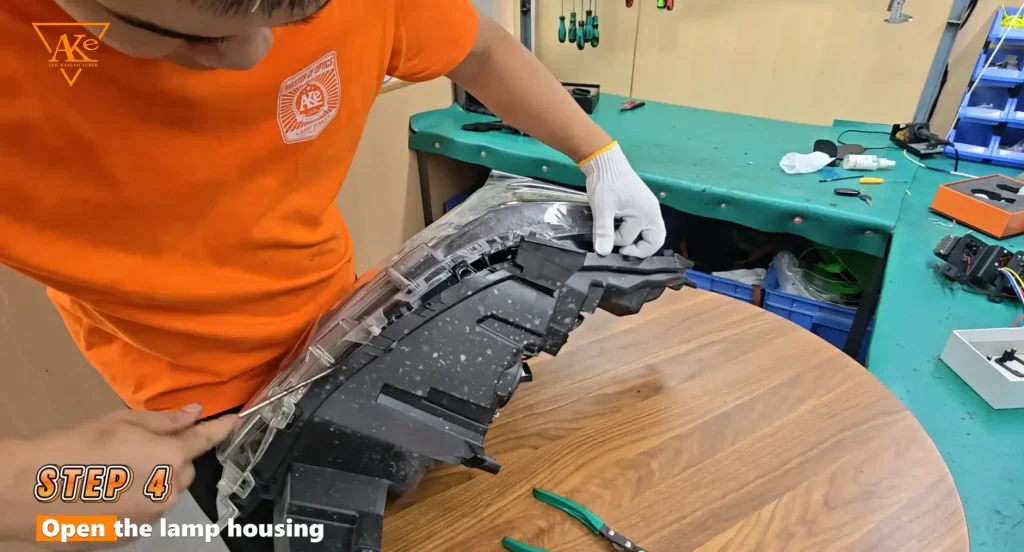
We placed the heated component on the workbench and carefully worked along the entire seam using tools.
- Do not apply excessive force.
After a few minutes, it was removed cleanly and neatly, without scratches or deformation.
Step 5: Disassemble the original headlight components
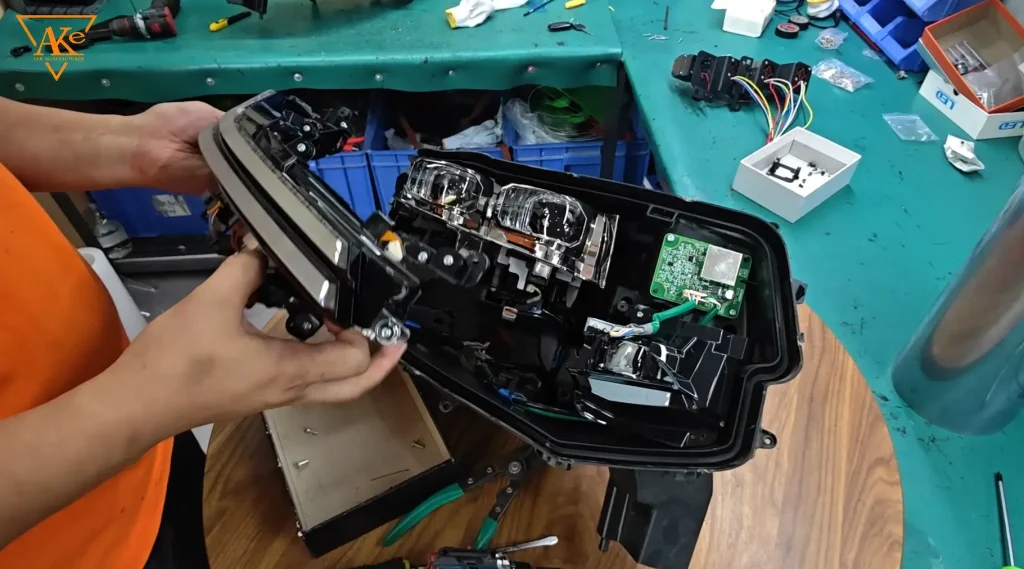
With the housing open, we proceed to remove all internal parts: the original brackets, screws, adjustment motors, and the factory reflector or lens unit.
We also disconnect all wiring connectors, noting their positions for later reassembly. This clears the way for installing the new AKE module as part of the Toyota Alphard LED headlight upgrade.
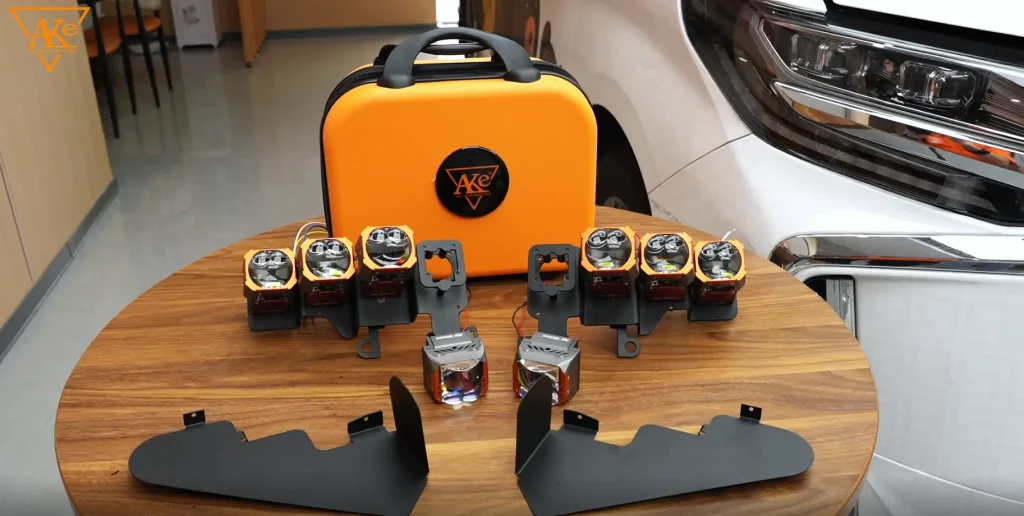
Step 6: Assemble the AKE Matrix LED Module
The AKE Matrix LED Module was then installed into the headlight assembly.
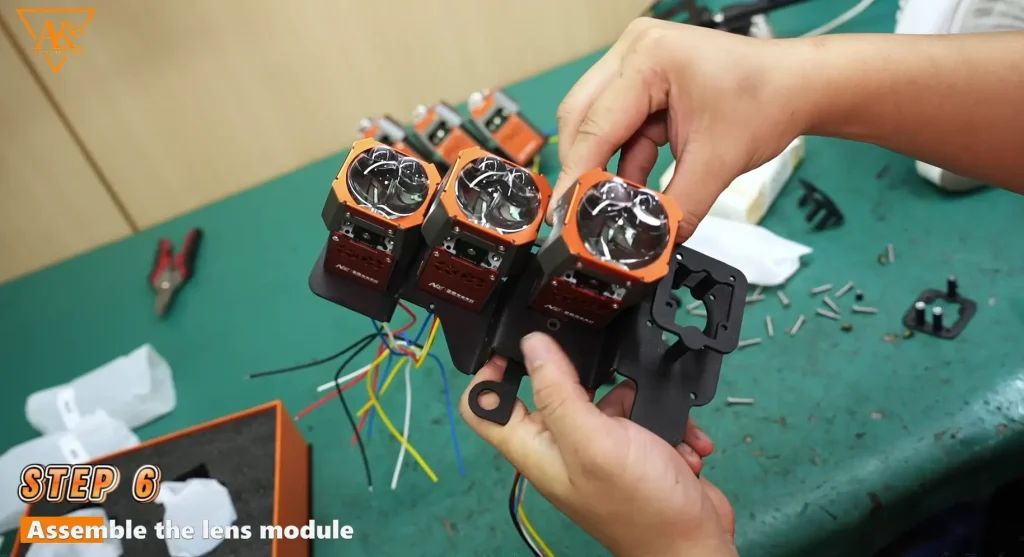
During installation, the technicians focused on:
- Correct mounting position
- Projector alignment
- Optical center positioning
- Wiring connection
- Heat management
- Structural stability
There is a key point is that the assembly process involves performing optical alignment one by one. Each M2 module is powered on, and the beam pattern is checked one by one.
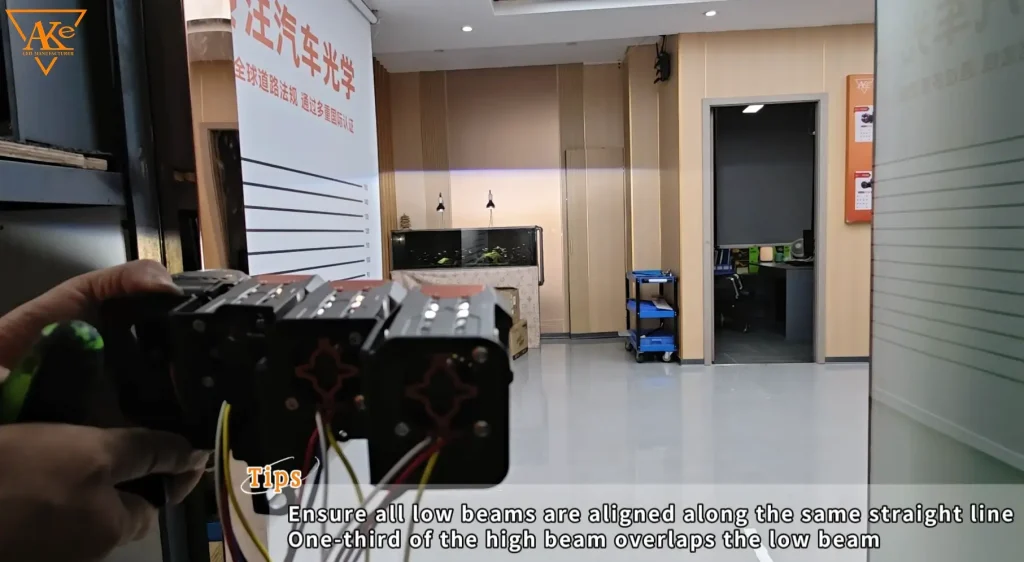
We need to ensure the output of every unit is precisely directed and perfectly synchronized with the others.
Tips: Ensure all low beams are aligned along the same straight line; one-third of the high beam overlaps the low beam
Step 7: Assembling the car lights
Once each AKE Matrix module has been individually tuned to perfection, it’s time to bring everything together. We carefully lower the entire module assembly – brackets, heat sinks, and wiring – into the waiting headlight housing, aligning it precisely with the factory locating pins.
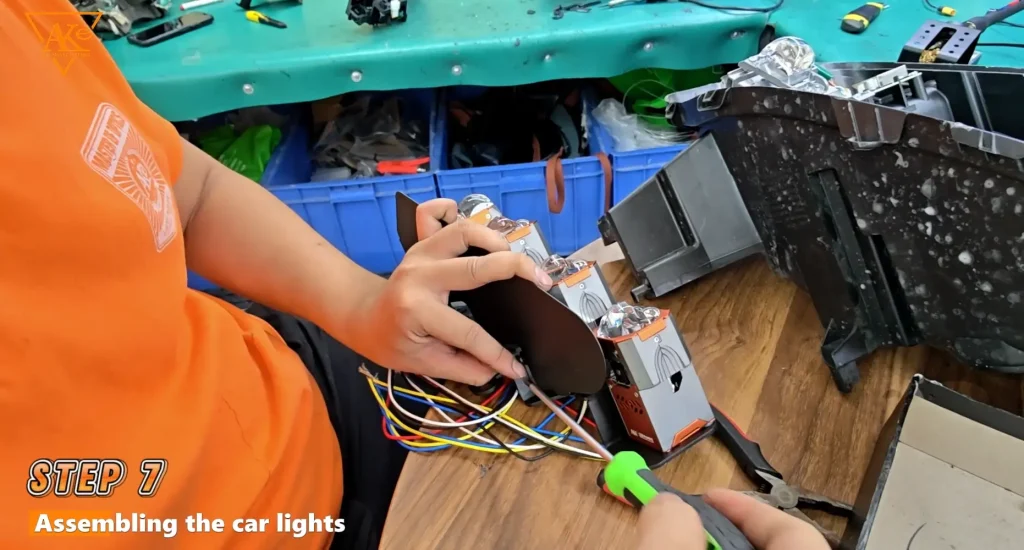
Then comes the detailed assembly work:
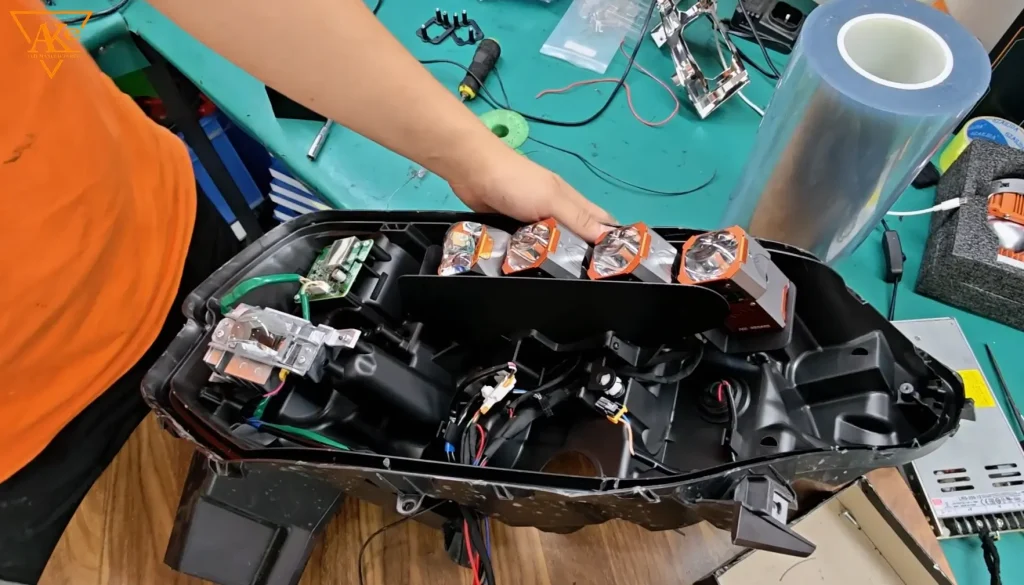
- Tightening every mounting bolt to the right torque – not too loose, not too tight.
- Tucking the wiring harness neatly along the housing channels, using cable ties to keep it secure and away from the lens movement areas.
- Reinstalling the factory internal bezels and chrome rings.
- Giving the entire assembly a final shake test to ensure nothing rattles and all connections are solid.
At the end of this step, the housing is fully assembled.
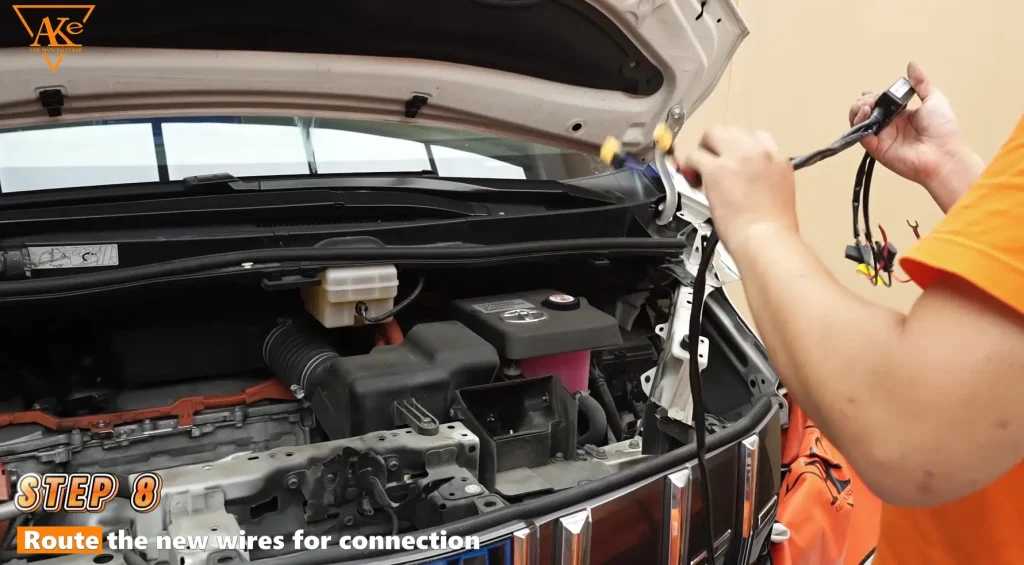
Step 8: Route the new wires for connection
In this step, we add a dedicated new wiring harness to power the AKE Matrix modules independently.
Step 9: Beam Pattern Adjustment
Before closing the headlight housing, we need to temporarily reinstall the assembled headlight assembly back into the Toyota Alphard’s front end, connect it to power, and conduct a final beam pattern check on the actual vehicle.
After installation, the headlights were tested and adjusted.
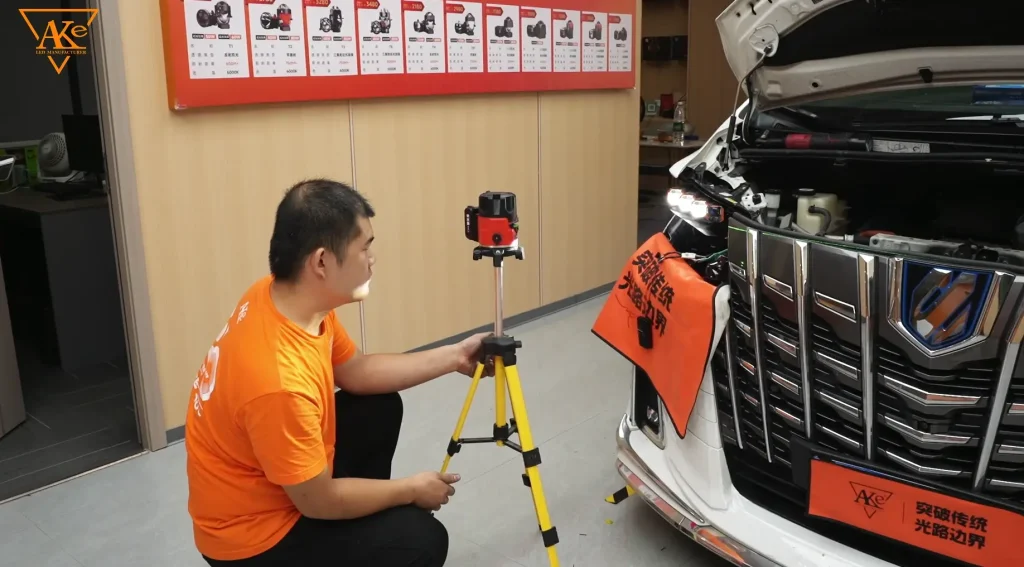
Beam pattern adjustment is one of the most important steps in professional lighting modifications.
Technicians checked the cutoff line, beam distribution, horizontal alignment, and overall road coverage.
The goal is to improve visibility while maintaining controllable and directional illumination.
This step allows for meticulous attention, as once the sealant is applied, there’s no going back. After calibration, the assembly is removed, ready for permanent sealing.
Step 10: Clean headlamp assembly & mount lens cover
After all testing and adjustments are complete, it’s time to close the headlight for good.
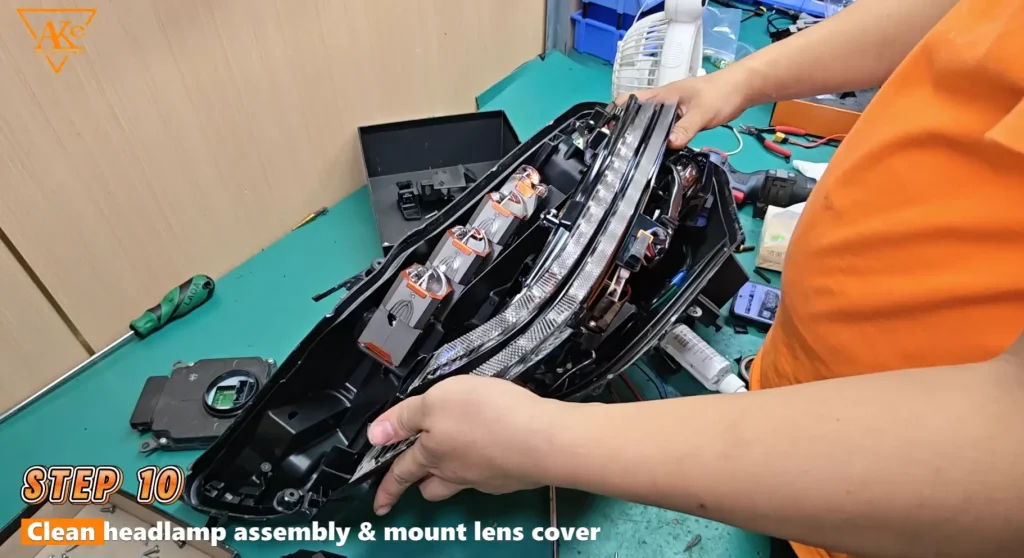
10.1 Final Cleaning (Pre‑Seal)
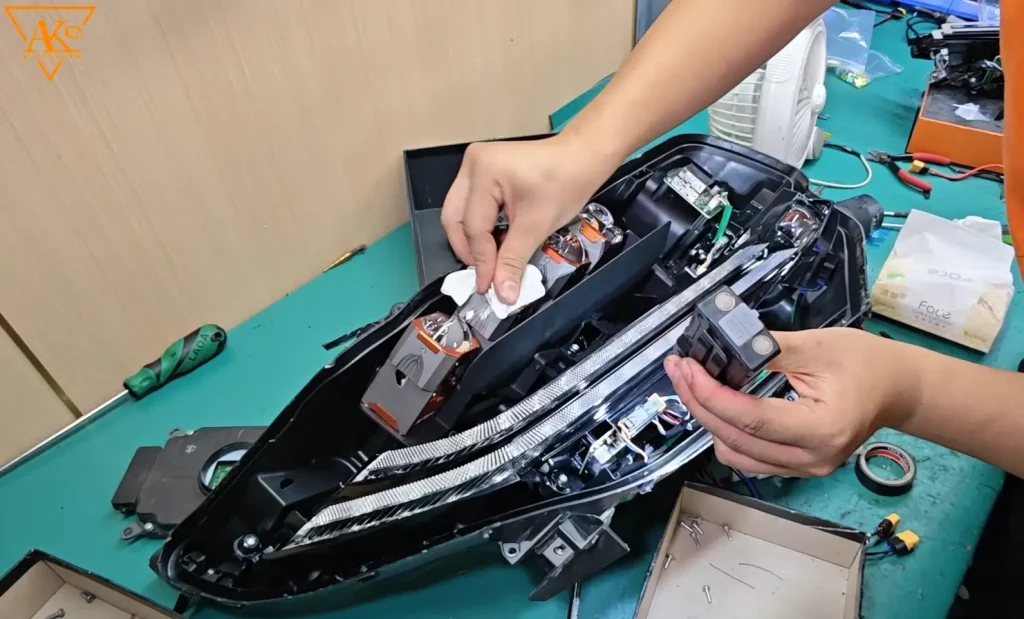
- Wipe housing interior and module surfaces using a lint‑free cloth + 70% isopropyl alcohol.
- Inspect under bright light – reject if any particle > 0.5 mm is visible.
- Compressed air (≤ 0.3 MPa) may be used to blow out hard‑to‑reach corners.
10.2 Sealant Application
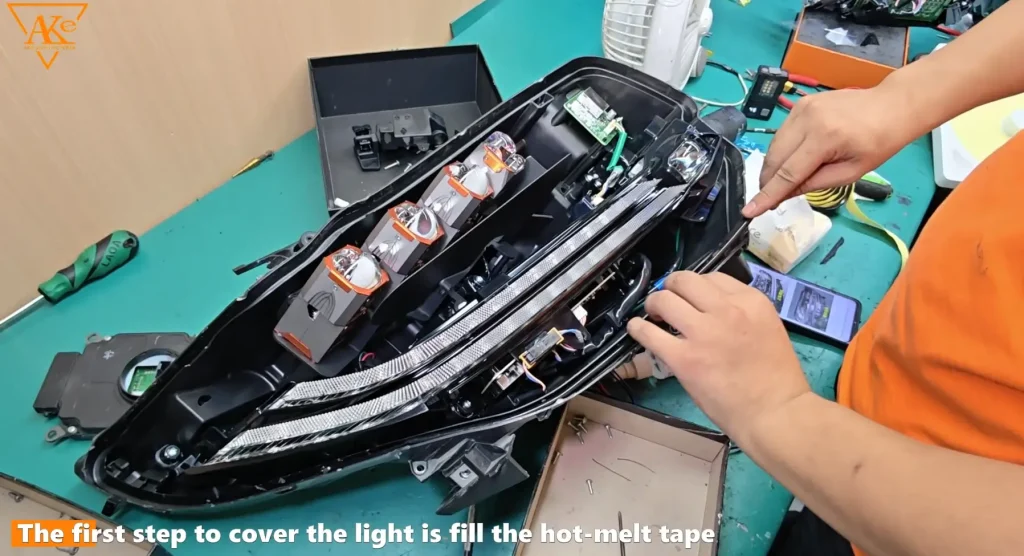
- Apply hot‑melt butyl tape (width: 6–8 mm) continuously along the housing sealing groove.
- Press firmly to achieve full adhesion – no breaks, overlaps, or thin sections.
- Ensure the tape ends meet with a 5 mm overlap, pressed flat to prevent leakage.
10.3 Oven Heating & Lens Closure
- Allow the assembly to cool for 10 minutes at room temperature.
- Install the completed headlight unit back onto the vehicle and reconnect all wiring.
Step 11: Recheck the car lights
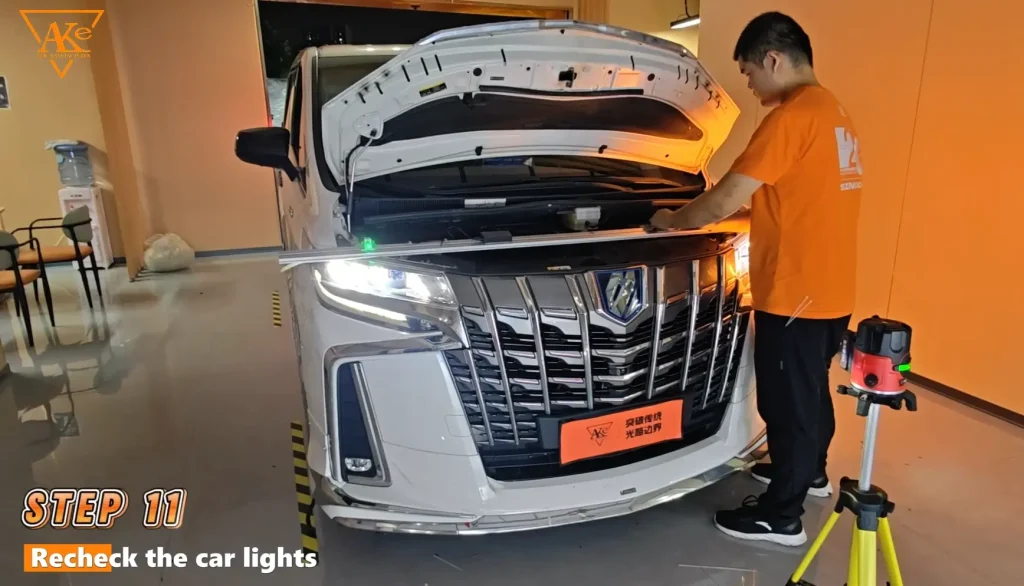
Before reinstalling the front bumper, we will check the headlights one last time to verify the beam pattern meets both factory specifications and local regulatory requirements.
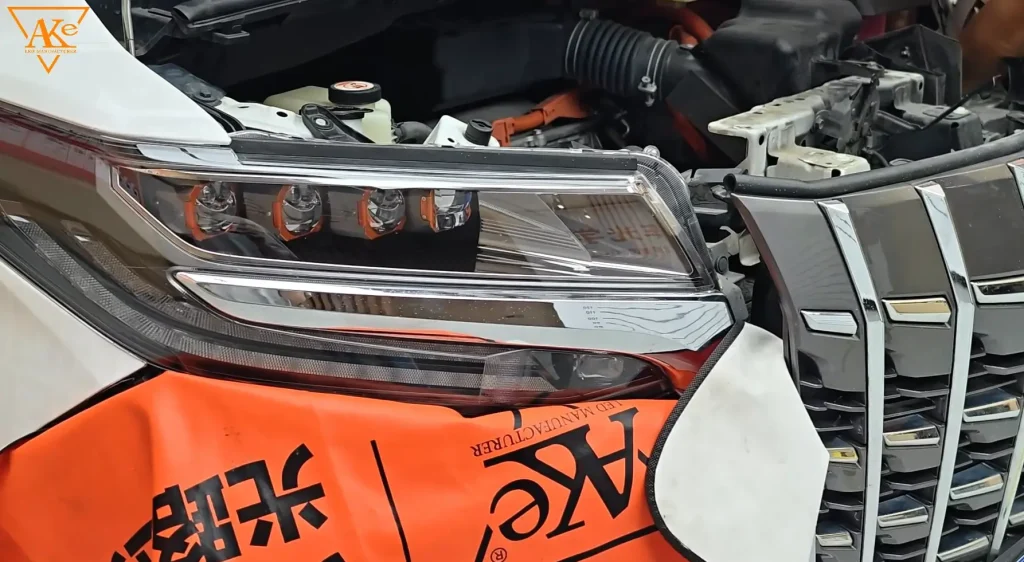
This final check covers low‑beam cutoff height, high‑beam focus, and glare control. Once everything is confirmed, we reinstall the bumper and all trim panels.
The vehicle is then thoroughly cleaned and handed back to the customer.
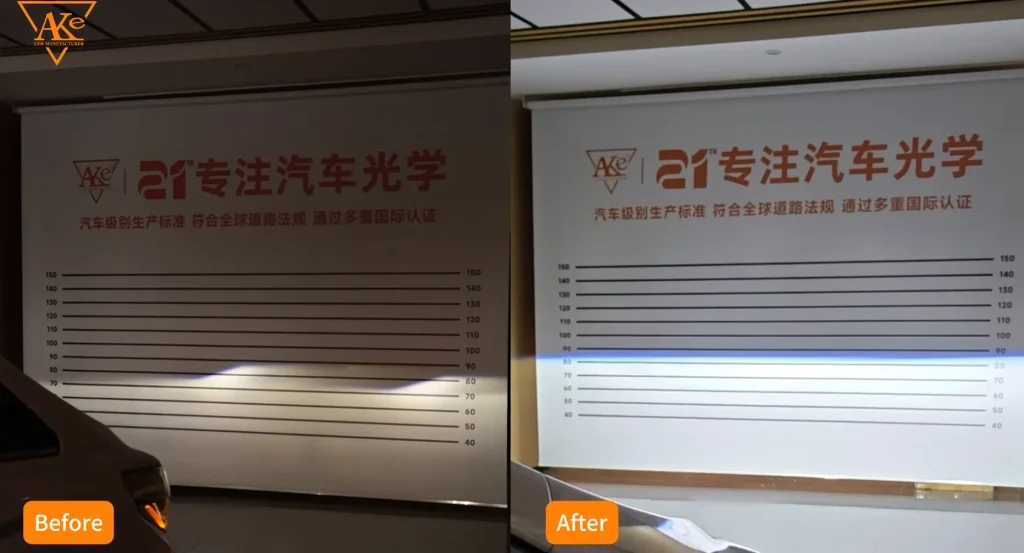
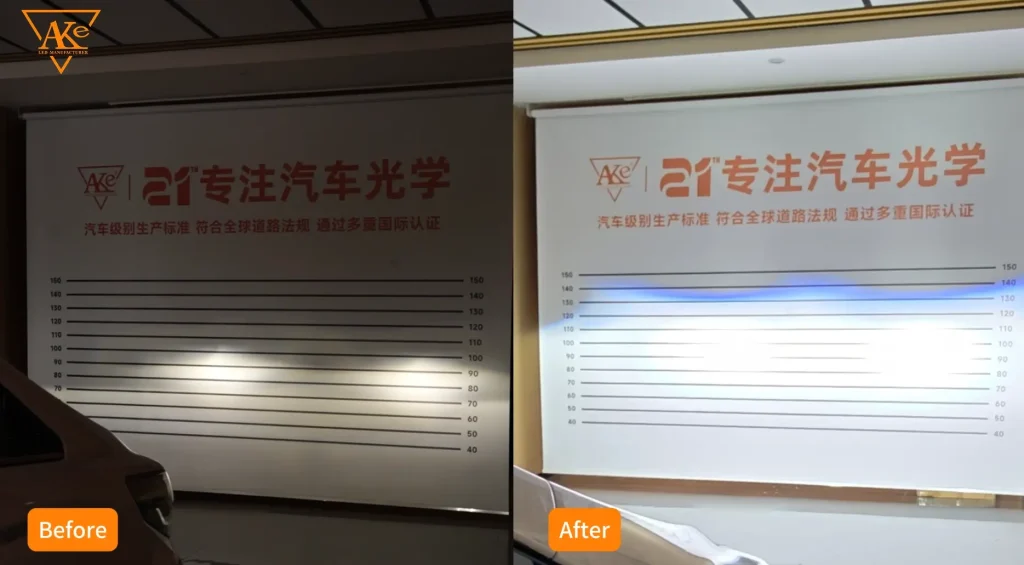
Before vs. After: Toyota Alphard LED Headlight Upgrade
By replacing the original internal lighting components with an AKE Matrix LED module, the modification team upgraded the Alphard’s lighting performance while maintaining the original headlight housing and premium appearance.
This Toyota Alphard LED headlight upgrade demonstrates how a professional Matrix LED retrofit can improve the overall lighting experience of a luxury MPV. The final result combines advanced lighting technology with professional installation and precise beam adjustment.
Conclusion
In this project, one of AKE’s offline automotive modification partners completed a professional Toyota Alphard LED headlight upgrade using an AKE Matrix LED Module. The project focused on improving the vehicle’s lighting performance and creating a more advanced and premium headlight appearance.
This Toyota Alphard LED headlight upgrade also demonstrates how Matrix LED modules and professional retrofit technology can create higher-value lighting solutions for luxury vehicles.
As you can see, Vehicle owners are increasingly interested in professional lighting upgrades.
- For automotive modification shops, Matrix LED modules and professional projector systems offer new opportunities to expand into higher-value lighting services.
- For automotive lighting distributors and brands, advanced products can also help expand into the growing premium automotive modification market.
AKE will continue to develop automotive lighting solutions and work with global partners to support professional automotive lighting upgrades.
If you are looking for a reliable automotive lighting manufacturer or want to explore Matrix LED modules, Bi-LED projector lenses, LED headlights, and other professional automotive lighting products, AKE welcomes the opportunity to work with automotive modification shops, distributors, and brands around the world.
